In this blog we will lern How to install OwnCloud on Rocky Linux and Alma Linux. A self-hosted open source file server called ownCloud makes sharing, collaboration, and safe storing possible. Your files, calendar, contacts, and other data are accessible through ownCloud, and they can be shared quickly and from any device. You may exchange files with other people and synchronize everything across your devices.
Introduction
Sharing files and collaborating on projects together are crucial, particularly when working as a team. It enables teams to complete tasks in a stylish and timely manner even when they are geographically separated.
Owncloud is a file server that consists of a set of applications that let users easily upload and distribute their folders and files in a comfortable and safe way. OwnCloud may be set up on a virtual server run by your web provider or an on-premise server.
OwnCloud is available in three editions: Standard, Enterprise, and Community. We’ll install the Community Edition, which is free and open-source and provides the essential functionality you need to get going.
Pre-requisite
A Rocky Linux 8 or 9 (Or AlmaLinux) instance with LAMP stack installed. You can refer our blog post to know How to Install LAMP Stack on Rocky Linux
Installing PHP Extensions
We will have to install additional PHP modules hence run the command to install
$ sudo dnf install php-curl php-gd php-intl php-json php-ldap php-mbstring php-mysqlnd php-xml php-zip php-opcache -y Database creation for OwnCloud
Login to the MariaDB database
$ sudo mysql -u root -pCreate the OwnCloud database inside MariaDB prompt
CREATE DATABASE owncloud_db;Create a user for the database and assign a password. Replace the ‘PASSWORD’ with your actual password
CREATE USER 'owncloud_user'@'localhost' IDENTIFIED BY 'PASSWORD';Assign ALL privileges to the user
GRANT ALL ON owncloud_db.* TO 'owncloud_user'@'localhost';Save and exit from the database
FLUSH PRIVILEGES;
exit;
Installing OwnCloud
You can download the tar file by visiting the Official Website Download Server Packages and move the file to the Rocky Linux Host. Alternatively you can simply copy the Tar file link and use the wget utility to download directly on the server.
wget https://download.owncloud.com/server/stable/owncloud-complete-20231213.tar.bz2
Extract the file to the webroot directory
$ sudo tar -jxf owncloud-complete-20231213.tar.bz2 -C /var/www/htmlChang the ownership to the apache user
$ sudo chown apache:apache -R /var/www/html/owncloudSet the permission
$ sudo chmod -R 775 /var/www/html/owncloudConfiguring Web Server for OwnCloud
Create the configuration file for Owncloud
$ sudo vim /etc/httpd/conf.d/owncloud.confAdd the below content to the above file
Alias /owncloud "/var/www/html/owncloud/"


<Directory /var/www/html/owncloud/>

  Options +FollowSymlinks

  AllowOverride All


 <IfModule mod_dav.c>

  Dav off

 </IfModule>


 SetEnv HOME /var/www/html/owncloud

 SetEnv HTTP_HOME /var/www/html/owncloud


</Directory>
Configure SELinux label
$ sudo setsebool -P httpd_unified 1Restart the Web Server
$ sudo systemctl restart httpdAccessing the Web UI & configuration
You can go to any browser of your choice and open the URL
http://server-ip/owncloudOutput
Follow the below :
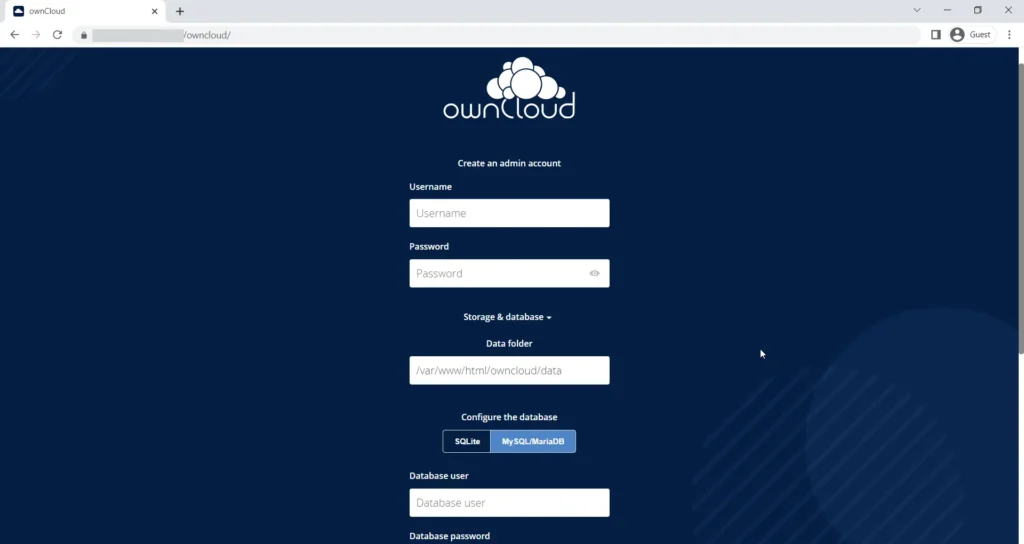
- To create an account, enter your password and username.
- Next, pick MySQL/MariaDB by clicking on Storage and Database.
- Enter the database name, password, and user information completely.
- And to finish the configuration, click the Finish configuration option.
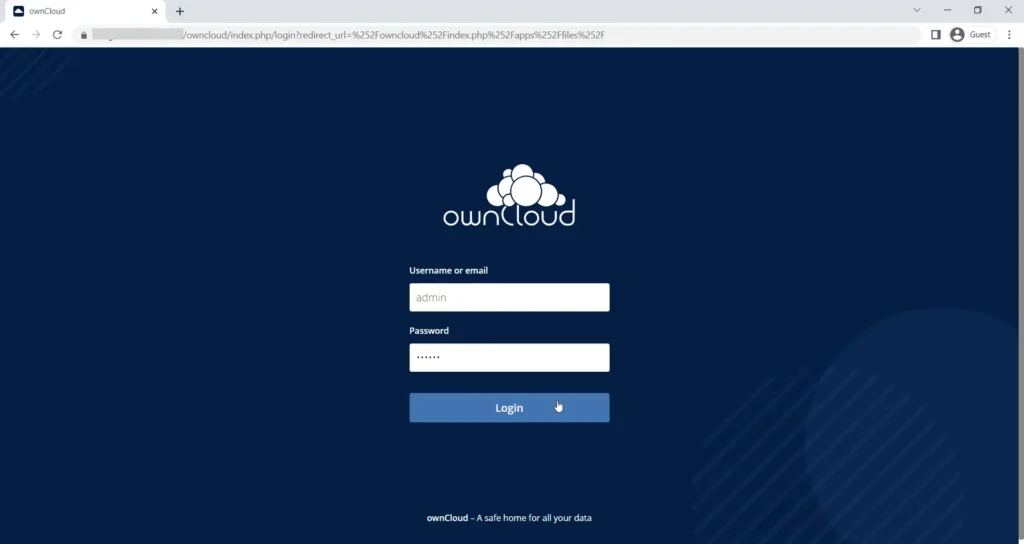
After the setup is completely finished, a login page will show up. To get access, enter the username and password you previously provided.
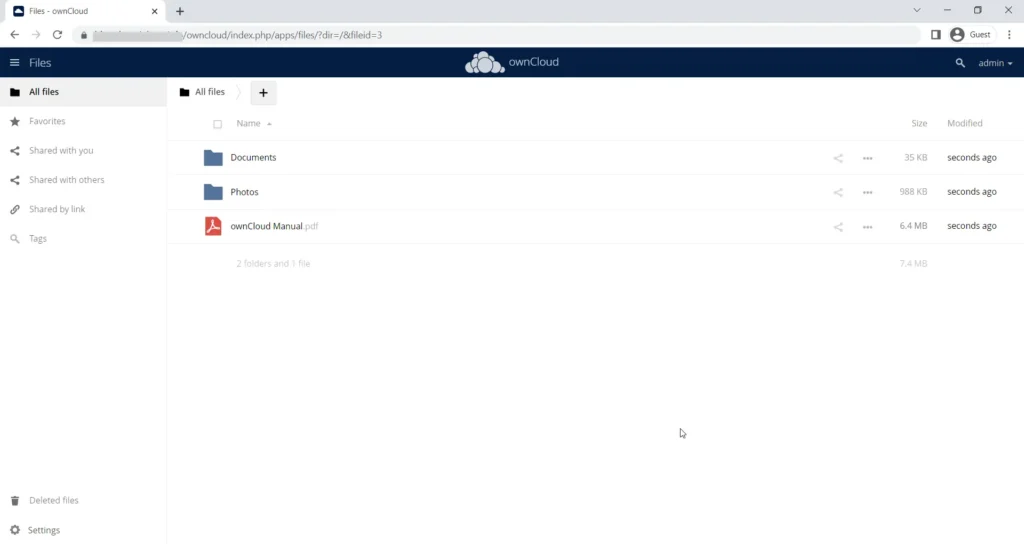
This is how the dashboard appears after logging in. You will be given choices for installing the ownCloud app on various platforms.
Conclusion
Finally, with this thorough tutorial has given you a step-by-step explanation of how to install ownCloud on Rocky Linux & Alma Linux. You may take advantage of safe storing, sharing, and collaboration with a self-hosted file server by following these procedures. To improve productivity and optimize workflow, embrace ownCloud’s ease of use and versatility.