In continuation with our previous blogs of Linux Bash Scripting for Beginners II where we engaged ourselves with variables followed by reading the inputs and displaying the outputs from our scripts file. At last we saw some basic bash commands which can be handy in our initial days of bash scripting. In this part we will learn about the Conditional statements , looping & branching, scheduling the scripts using cron followed by troubleshooting & debugging skills.
Conditional Statements (if/else)
Conditions are expressions that return a boolean outcome, either true or false. Conditions can be evaluated using if, if-else, if-elif-else, and nested conditionals, among other methods.
Syntax for bash conditional statements
if [[ condition ]];

then

	statement

elif [[ condition ]]; then

	statement

else

	do this by default

fi
Logical operators like AND -a and OR -o allow us to do more meaningful comparisons.
if [ $a -gt 70 -a $b -lt 90 ]The above statement will checks if both conditions is true: a is greater than 70 AND b is less than 90.
We will now go through an example that of a bash that will use if, if-else, if-elif-else to check if a user-inputted number is positive , negative or zero.
#!/bin/bash


echo "Please enter a number: "

read num

if [ $num -gt 0 ]; then

  echo "$num is positive"

elif [ $num -lt 0 ]; then

  echo "$num is negative"

else

  echo "$num is zero"

fi
The user is initially prompted by the script to input a number. After that, an if statement is used to determine whether the value is larger than 0. In that case, the script generates a positive number. The script advances to the next sentence, an if-elif statement, if the integer is not more than 0. The script here determines whether the value is smaller than 0. In that case, the script returns a negative value. Lastly, the script outputs that the value is zero using an else statement if it is neither more than 0 nor less than 0.
Output with different input values :

Looping
While Loop
While loops continue until the condition is still true by checking for it. To regulate the execution of the loop, we must supply a counter statement that increases the counter.
The counter statement in the example below that increases the value of i is (( i += 1 )). There will be 5 iterations of the loop.
#!/bin/bash
i=1
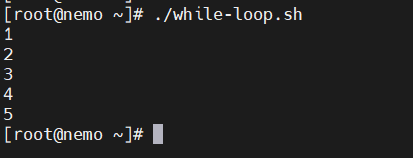
while [[ $i -le 5 ]] ; do
echo "$i"
(( i += 1 ))
doneOutput
For Loop
Similar to the while loop, the for loop lets you run statements a certain number of times. Every loop has a different syntax and application.
The loop in the example below will run 7 times.
#!/bin/bash

for i in {1..7}

do

    echo $i

done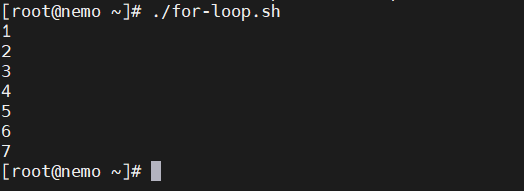
Case Statement
Case statements are used in Bash to compare a given value to a list of patterns and then run a block of code according to the first matching pattern. In Bash, a case statement has the following syntax:
Syntax for a case statement
case expression in

    design1)

        # code to execute if expression matches design1

        ;;

    design2)

        # code to execute if expression matches design2

        ;;

    design3)

        # code to execute if expression matches design3

        ;;

    *)

        # code to execute if none of the above design match expression

        ;;

esac
Here, “expression” is the value that we want to compare, and “design1”, “design2”, “design3”, and so on are the design that we want to compare it against.
The double semicolon “;;” separates each block of code to execute for each design. The asterisk “*” represents the default case, which executes if none of the specified design match the expression.
We will understand with an example now
veg="spinach"

case $veg in
    "spinach")
        echo "This is a green veg."
        ;;
    "pumpkin")
        echo "This is a yellow veg."
        ;;
    "carrot")
        echo "This is an orange veg."
        ;;
    *)
        echo "Unknown veg."
        ;;
esac
In this case, the code block that repeats “This is a green veg.” is run since the value of “veg” is “spinach,” matching the first pattern. The second pattern would match and the block of code that repeats, “This is a yellow veg.” would run if the value of “veg” were changed to “pumpkin,” and so on. Should the value of “veg” not correspond with any of the designated patterns, the default scenario repeats “Unknown veg.”
Scheduling scripts using cron
Operating systems similar to Unix come with a sophisticated tool for scheduling jobs called Cron. You may program automatic tasks to run on a daily, weekly, monthly, or even more precise schedule by using cron. Cron’s automation features are very important for Linux system administration.
Syntax to schedule a cron
# Example for Cron Job
* * * * * sh /path/to/script.sh
In the above example * represent minute(s) hour(s) day(s) month(s) weekday(s), respectively.
Let me show you some example of scheduling Cron Jobs
| Entry | Description | Equivalent to |
|---|---|---|
@yearly (or @annually) | Run once a year at midnight of 1 January | 0 0 1 1 * |
@monthly | Run once a month at midnight of the first day of the month | 0 0 1 * * |
@weekly | Run once a week at midnight on Sunday | 0 0 * * 0 |
@daily (or @midnight) | Run once a day at midnight | 0 0 * * * |
@hourly | Run once an hour at the beginning of the hour | 0 * * * * |
@reboot | Run at startup | — |
Crontab
The cron jobs may be added to and edited using the crontab program.
For a specific user, crontab -l displays the programs that are already scheduled.
Use crontab -e to add or modify the cron.
More more Info refer the Wiki for Cron
Debugging & troubleshooting Bash Scripts
Troubleshooting and debugging are vital abilities for every Bash script writer. Although Bash scripts have a lot of power, they may also make mistakes and behave strangely. This section will go over several tricks and methods for diagnosing and debugging Bash scripts.
Setting ‘set -x’
Setting the set -x option at the script’s start is one of the most helpful debugging strategies for Bash scripts. When debugging mode is enabled, every command that Bash performs is printed to the terminal, preceded by a + sign. This may be quite useful in pinpointing the exact locations in your script where mistakes are happening.
#!/bin/bash
set -x
# The Scripts starts from Here....
Exit Code
When an error occurs, Bash sets an exit code that describes the type of problem. The $? variable can be used to see the exit code of the most recent command. Success is indicated by a value of 0, and errors are indicated by any other value.
#!/bin/bash
# The Scripts starts from Here....
if [ $? -ne 0 ]; then
  echo "Error occurred."
fi
‘echo’ statements
A helpful tip for troubleshooting Bash scripts is to include echo statements in your code. This might assist you in determining the locations of mistakes and the values that are being assigned to variables.
#!/bin/bash
# The Scripts starts from Here....
echo "Value of variable y is: $y"
# Other Part of your code continues...
Setting ‘set -e’
Use the set -e argument if you want your script to terminate instantly upon the failure of any command. This option will make it simpler to find and correct mistakes in your script by causing Bash to quit with an error if any of the script’s commands fail.
#!/bin/bash
set -e
# The Scripts starts from Here....
Logs for Cron
The log files might be used for cron troubleshooting. All of the scheduled jobs have logs kept for them. Logs provide you with the ability to confirm whether a certain job completed as planned.
For deb based system such as Debian & Ubuntu you may find the logs at
/var/log/syslogFor rpm based system such as RHEL, Rocky, Alma & CentOS you may find logs at
/var/log/messagesAnd the logs for cron will be similar as below
2024-01-21 00:00:01 Task started

2024-01-21 00:00:02 Running script /location/to/script1.sh

2024-01-21 00:00:03 Script completed successfully

2024-01-21 00:05:01 Task started

2024-01-21 00:05:02 Running script /location/to/script2.sh

2024-01-21 00:05:03 Error: unable to connect to database

2024-01-21 00:05:03 Script exited with error code 1

2024-01-21 00:10:01 Task started

2024-01-21 00:10:02 Running script /location/to/script3.sh

2024-01-21 00:10:03 Script completed successfully
Conclusion
Finally with this tutorial we came to final and last part of our blog on bash scripting for beginners. Overall throughout our tutorials we performed some simple commands in bash after learning how to enter the terminal. Additionally, we learned about bash shells. We took a quick look at utilizing conditionals and loops to branch the code. Lastly, we spoke about utilizing Cron to automate the scripts and then various troubleshooting methods.