Let us see how to install CheckMK on Red Hat and derivatives such as Rocky Linux or Alma Linux . Checkmk is an open-source monitoring server that is an improvement of Nagios operating system with enhanced plugins and monitoring capabilities. Checkmk uses agents to collect and ship remote systems’ metrics to the server. The agents are available for both Linux and Windows systems in 32 & 64-bit architectures.
The document will also be applicable for EL 9 based operating system. We will install Checkmk using the OMD (Open Monitoring Distribution) bundle. This bundle ships with Nagios and all the necessary plugins required for monitoring various services.
In case you need support for OS installation you can refer our previous blog post How to Install Rocky Linux 8
Update the system
Before we start to install the packages let us have the system up to date.
$ sudo dnf update -yOnce the system is updated reboot it once.
Install the Dependencies
We will need the EPEL (Extra Packages for Enterprise Linux) repositories to be installed that provides additional packages that are not present in the default AppStream repositories for Rocky Linux 8. To install the EPEL repo use the below command
$ sudo dnf install epel-releaseNow lets ensure that you install xinetd and OpenSSL packages. Therefore, run the command:
$ sudo dnf install xinetd openssl -yAlthough the Python 3 comes preinstalled by default on Rocky 8 but In case it is not installed on your system then run following command to install it
$ sudo dnf install python3 -yVerify the python version installed
[rocky-linux@checkmk ~]$ python3 -V

Python 3.6.8

[rocky-linux@checkmk ~]$
Install ‘graphiz-gd’ package from PowerTools repository, run the following dnf command
$ sudo dnf --enablerepo=PowerTools install graphviz-gd -ySetting SELinuix & Firewall rules
SELinux is a kernel security module that enhances the security of your RHEL derivatives system. Set the following selinux rule to allow web server to access network interfaces,
$ sudo setsebool -P httpd_can_network_connect 1Now allow http service or its port in firewall
$ sudo firewall-cmd --zone=public --add-service=http --permanent
$ sudo firewall-cmd --reload
You can skip the above steps if the SELinux & Firewall is disabled on the system but it is always recommended from the security perspective.
Installing the CheckMK monitoring packages
Now after the dependencies are installed its time to install the Checkmk packages for which we need to download the packages from its official websites
$ wget https://download.checkmk.com/checkmk/2.2.0p17/check-mk-raw-2.2.0p17-el9-38.x86_64.rpm
Once downloaded install Checkmk rpm package with –nogpgcheck option to avoid signing of the package which might result in errors later on during the installation process.
$ sudo dnf install --nogpgcheck check-mk-raw-2.2.0p17-el9-38.x86_64.rpm -yAfterwards we can test if the installation was successful by running the omd version command:
$ omd versionWe will now have to create the OMD instance. Let us create one testing instance
$ sudo omd create monitoring
After the site has been created you will see an output similar to the one below
Adding /opt/omd/sites/monitoring/tmp to /etc/fstab.

Creating temporary filesystem /omd/sites/monitoring/tmp...OK

Restarting Apache...OK

Created new site monitoring with version 2.2.0p17.cre.


    The site can be started with omd start monitoring.

    The default web UI is available at http://your_server/monitoring/


    The admin user for the web applications is cmkadmin with password: generated-password

    (It can be changed with 'htpasswd -m ~/etc/htpasswd cmkadmin' as site user.)

    Please do a su - monitoring for administration of this site.
The above command will create a new omd instance together with a user and a group called ‘monitoring’ alongside the user’s home directory which is created in the ‘/omd/sites/monitoring’ path.
Here you can see the URL on which your site is accessible, default username, and an automatically generated password for accessing the site. The site is now created, but it still needs to be started. To start the site, type. a
$ omd startWhen everything has been started successfully you will see an output similar to the one below.
Starting mkeventd...OK

Starting liveproxyd...OK

Starting mknotifyd...OK

Starting rrdcached...OK

Starting cmc...OK

Starting apache...OK

Starting dcd...OK

Starting redis...OK

Initializing Crontab...OK
Now you can access the Check_MK front end interface. Open your web browser and browser the URL shown:
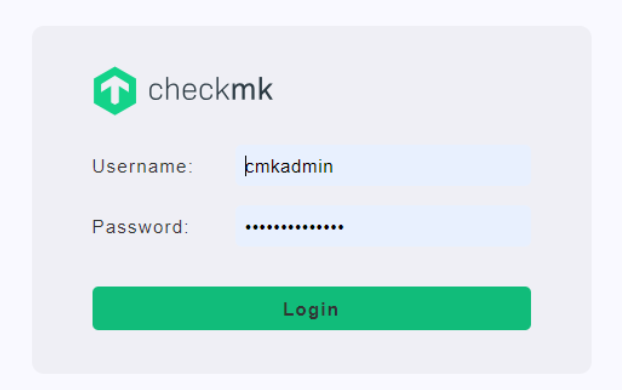
Sign in using the username cmkadmin and password provided when creating the omd instance
You can also refer the official site for the CheckMK for further details on configuring the clients for Monitoring The IT monitoring platform – for cloud and hybrid IT