Today, we have the blog presenting How to Install WordPress on Rocky Linux.
Introduction
From being just a blogging platform, WordPress has developed into one of the world’s most popular Content Management System (CMS) platforms. WordPress has several applications, including business websites, online stores, social networks, support forums, video websites, online portfolios, and much more.
Even while you might be tempted to choose a premium edition of WordPress, such those available on wordpress.com, a self-hosted instance might be a better option. Furthermore, you’ve already reached halfway if you have an extra Rocky Linux instance.
Now let’s go over how to install WordPress on Rocky Linux. Though there are a few stages involved, it’s quite simpler than you may imagine.
Pre-Requisite
- Host with Rocky Linux 8 or 9. If you need support for installation refer How to Install Rocky Linux
- A user with sudo privileges
Installing Web & Database
Installing the database and web servers should come first. Although we will be using NGINX as our web server in this tutorial, you are free to use Apache or any other PHP-compatible web server of your choice.
To begin, sign in to your server, launch a terminal window, and use the following command to install NGINX:
sudo dnf install nginx -yEnable and restart the NGINX service
sudo systemctl enable --now nginx
sudo systemctl restart nginx
The relational database that WordPress uses to store all of the site’s settings and content can be installed now. Although MariaDB is being used in this instance, WordPress has additional settings, much like with the web server.
Use this command to install MariaDB:
sudo dnf install mariadb-server -yEnable the service at boot followed by restart
sudo systemctl enable --now mariadb
sudo systemctl restart mariadb
Database creation
Login to MariaDB
sudo mysqlCreate the database now
CREATE DATABASE wordpress DEFAULT CHARACTER SET utf8 COLLATE utf8_unicode_ci;Now we create a DATABASE user
GRANT ALL ON wordpress.* TO 'wordpressuser'@'localhost' IDENTIFIED BY 'password';In the above command ‘password’ is a strong and unique password. Make sure you provide rights to the web server’s IP address rather than localhost if your database is being hosted on a different Rocky Linux instance.
Use these commands to FLUSH the privileges and close the console:
FLUSH PRIVILEGES;
exit
PHP Installation & Configuration
PHP may now be installed. Additionally, this will integrate php-fpm, a utility that improves website performance by running quicker than conventional CGI techniques. PHP-fpm is also used by PHP as its daemon.
Prior to installing PHP, we need to add the EPEL repository using:
sudo dnf install epel-release -yNow Install PHP
sudo dnf module install php:8.2 -yInstalling other required packages
sudo dnf install php-fpm php-curl php-gd php-intl php-mbstring php-soap php-xml php-zip php-mysqli -yRestart the php-fpm service
sudo systemctl restart php-fmNGINX Configuration
The creation of an NGINX configuration file is the following stage. For the file name, you can use your IP address or hostname. Make that file using:
sudo vi /etc/nginx/conf.d/example.com.confHere , example.com is the name of the domain. You can replace with your own Hostname or IP
Paste the below content to the above file
server {
server_name HOSTNAME or IP;
    root /var/www/html/wordpress;
    index index.html index.htm index.nginx-debian.html index.php;
    location / {
        try_files $uri $uri/ /index.php$is_args$args;
    }
    location = /favicon.ico { log_not_found off; access_log off; }
    location = /robots.txt { log_not_found off; access_log off; allow all; }
    location ~* \.(css|gif|ico|jpeg|jpg|js|png)$ {
        expires max;
        log_not_found off;
    }
    location ~ \.php$ {
        try_files $uri =404;
        fastcgi_split_path_info ^(.+\.php)(/.+)$;
        fastcgi_pass unix:/run/php-fpm/www.sock;
        fastcgi_index index.php;
        fastcgi_param SCRIPT_FILENAME $document_root$fastcgi_script_name;
        include fastcgi_params;
    }
}
In the above file replace HOSTNAME or IP with your own machine domain name or IP. Once done save and exit the file
Downloading WordPress
Move to the /tmp directory
cd /tmpDownload the wordpress file
sudo curl -LO https://wordpress.org/latest.tar.gzExtract the file to folder /var/www/html/
sudo tar xzvf latest.tar.gz -C /var/www/html/Move to the new directory
cd /var/www/html/wordpressCopy the configuration file
sudo cp wp-config-sample.php wp-config.phpProvide the necessary ownership
sudo chown -R nginx:nginx /var/www/wordpress/Give the proper Permission
sudo chmod -R 775 /var/www/html/wordpressConfigure the SELinux context for the directory and its contents.
sudo semanage fcontext -a -t httpd_sys_rw_content_t "/var/www/html/wordpress(/.*)?"Run the below command for the SELinux changes to come into effect
sudo restorecon -Rv /var/www/html/wordpressConfigure WordPress
The first step is to use the official secret generator to download unique secure values for WordPress using the following command:
sudo curl -s https://api.wordpress.org/secret-key/1.1/salt/Now we need to copy those values. Open the wp-config.php file
sudo vi wp-config.phpNow you would see something the below in the above file
define('AUTH_KEY', 'put your unique phrase here');
define('SECURE_AUTH_KEY', 'put your unique phrase here');
define('LOGGED_IN_KEY', 'put your unique phrase here');
define('NONCE_KEY', 'put your unique phrase here');
define('AUTH_SALT', 'put your unique phrase here');
define('SECURE_AUTH_SALT', 'put your unique phrase here');
define('LOGGED_IN_SALT', 'put your unique phrase here');
define('NONCE_SALT', 'put your unique phrase here');
Substitute the secret values produced by the WordPress secret generator in that area.
Next, find the database definition section and enter the values we established in the MariaDB console in lieu of the following ones:
define('DB_NAME', 'wordpress');
/** MySQL database username */
define('DB_USER', 'wordpressuser');
/** MySQL database password */
define('DB_PASSWORD', 'password');
Save and Close the file
Allow the Firewall Ports
Open the firewall ports using the below command
sudo firewall-cmd --add-port=80/tcp --permanent
sudo firewall-cmd --add-port=443/tcp --permanent
sudo firewall-cmd --reload
Setting up the WordPress through browser
Open browser of your choice and Hit in the browser with the below URL
http://server-IP or Hostname/The WordPress installation page will appear. Here, you may fill out the required fields and click Install WordPress to finish the procedure.
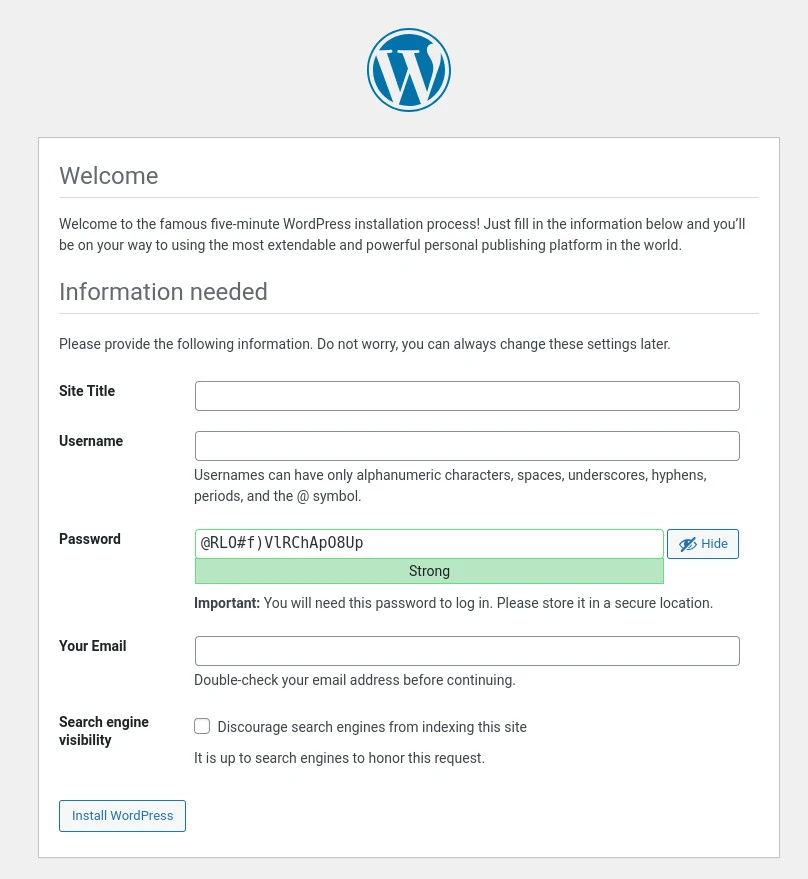
The page where you install WordPress is prepared to assist you with the remaining steps.
Conclusion
WordPress has been successfully installed on Rocky Linux. From this point on, you can build your website or blog and take use of all the wonderful features that WordPress offers, such as free themes and plugins that improve the appearance and usability of your website. If you need more details refer the official WordPress Website for Advanced Administration Guide